Monday, December 13, 2021

The French High Command Reacts

Disappointing.

After a full day of activity the French lost two full detachments, and what do they have to show for it?  They chased off a crowd of rabble.  Fortunately for Colonel LeNoloc, the High Command retains faith in his abilities.  They have deigned to grant him replacements for the troops lost.  However, with these troops comes a stern warning that a second day of failure will see him shipped off to the Americas to languish in that barbarian wasteland filled with savages and worse - more British.  And even worse than that - Americans!

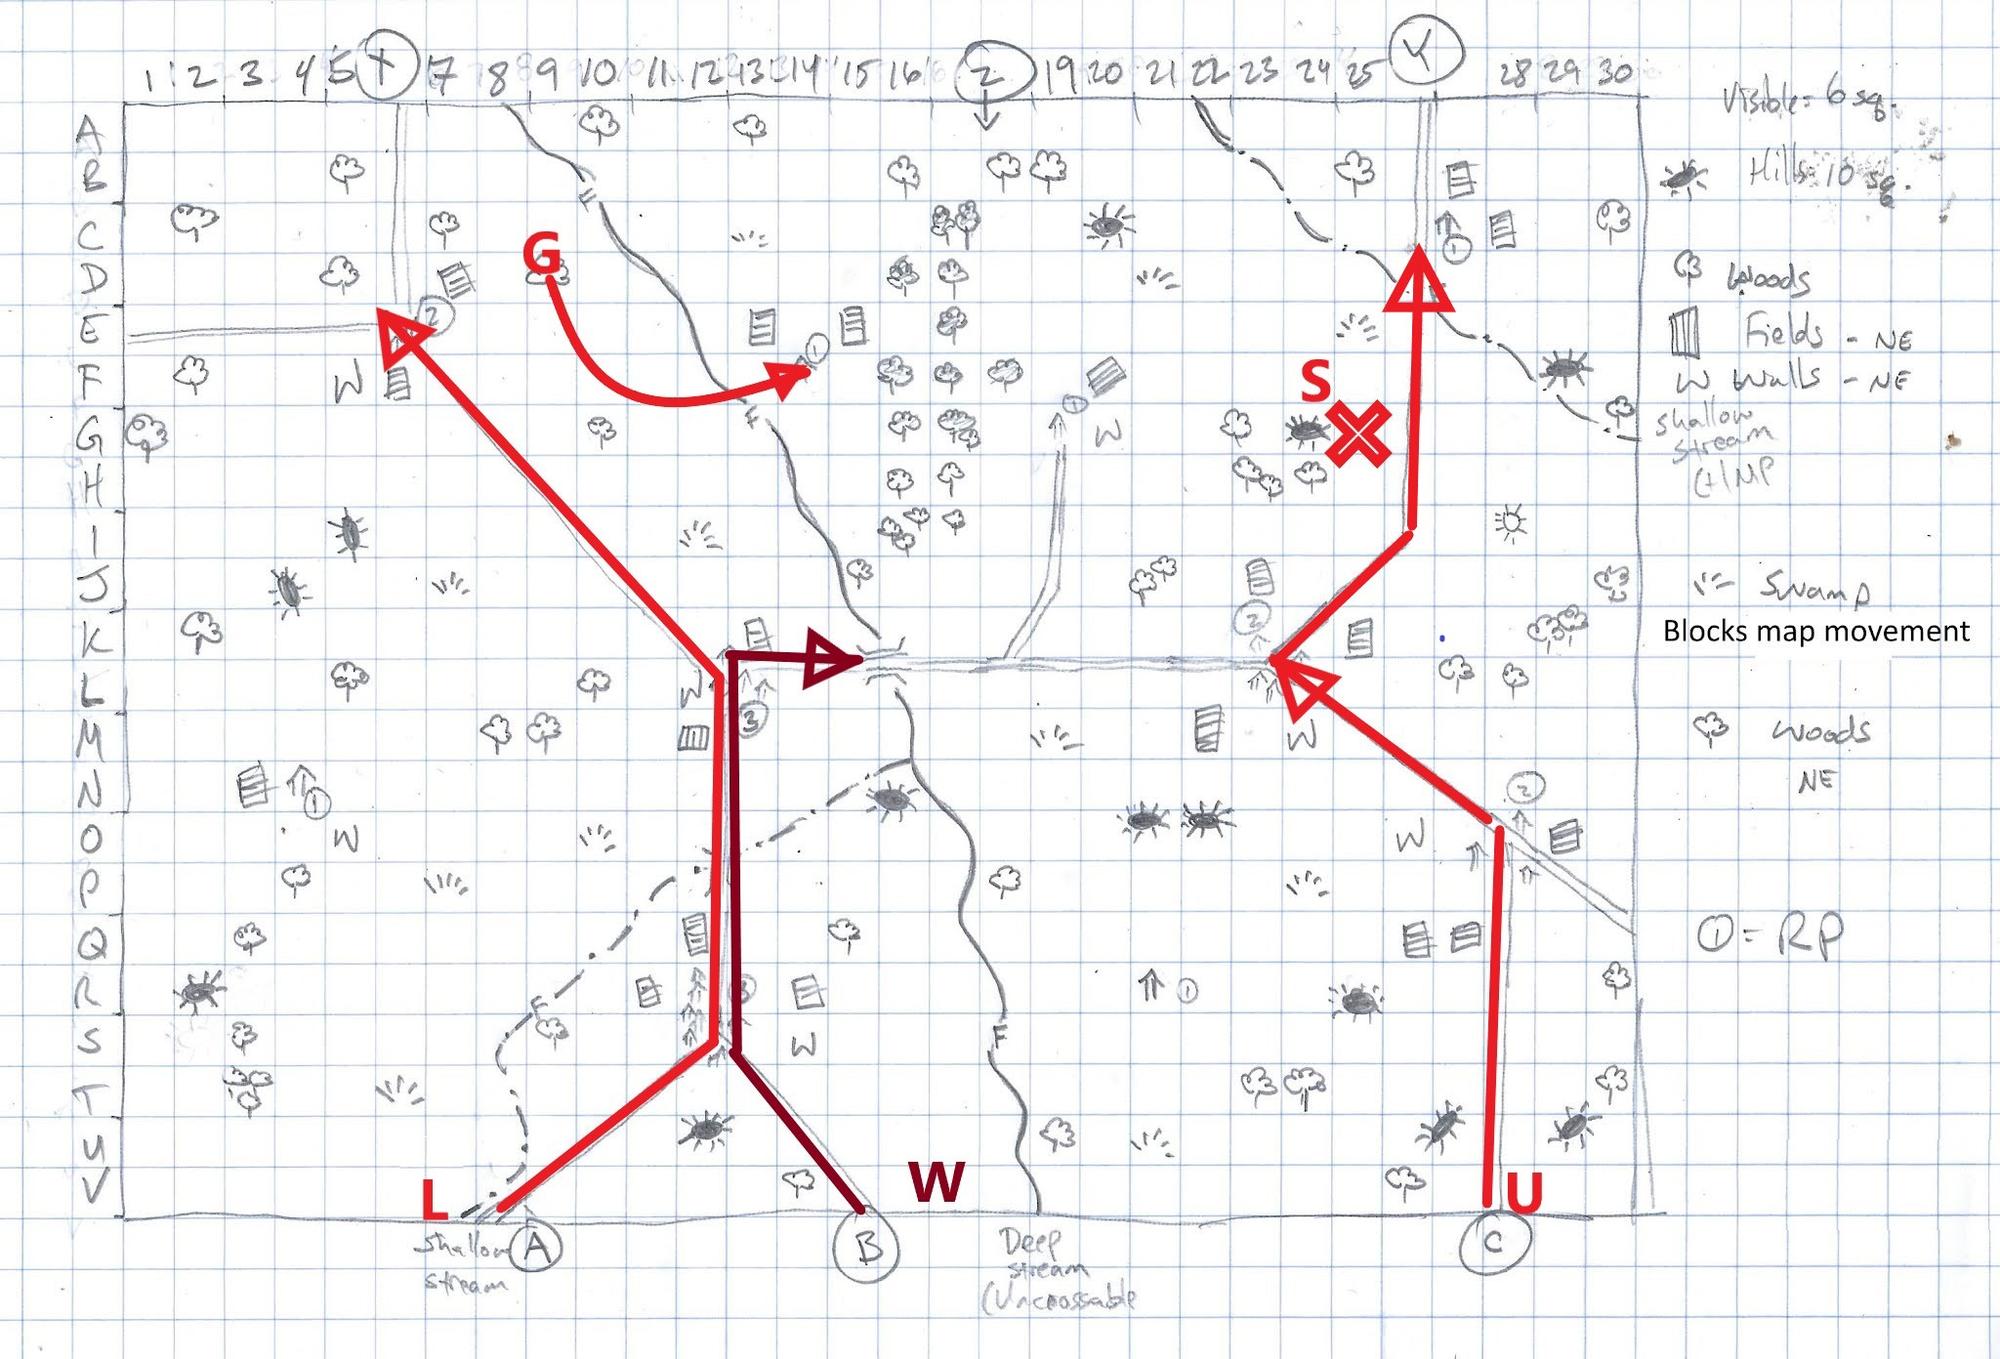
With a detailed scouting report of the locations and strength of enemy forces, and one load of supplies nearing the northern edge of the county, General Elan can feel some optimism about his chances in the coming day.  The spy he has running around the country side gives him a full run-down of the situation, and then returns to the Five Villages to get some rest before another day of skulking and hi-jinks.

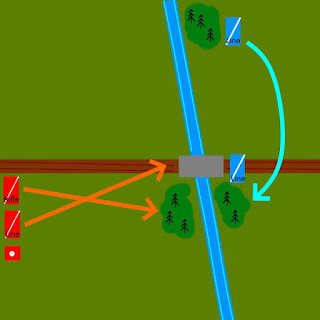
Due to the day's activity, Detachment Blanc begins Day Two in possession of one wagonload of supplies (1VP) in train.  They are camped atop the hill located at C20 and from that vantage can see British activity at Orange Chicken Bridge and Hethwill Farm, thus confirming the spy's reports.  They MUST escort the wagon off the north edge of the map first, spend one turn handing over the supplies.  That means that Detachment Blanc will not be available until Turn Five, at which point they can re-enter the map within three squares of where they exited on the Turn Three.

The French Spy remains active in the area.

French reinforcements consist of the following:

Detachment Dore (cavalry)
    Lt. Colonel Taureau (bloodthirsty)

One unit of Hussars

  • Marachel-des-logis
  • One bugler
  • Eight Hussars
Detachment Argent
    Lt. Colonel Sevanouir (tactical fox)

    Two units of Light Infantry
  • 1 Sergeant
  • 1 Standard Bearer
  • 9 Light infantrymen
    One small cannon
  • Captain with pistol and sabre
  • Three crew with muskets
French High Command also offers General Elan one unit of Foot Dragoons (one seargeant and four dragoons) which can be attached to either of Detachment Dore or Argent.  Along with a reminder that foot dragoons move at cavalry pace on map moves and thus can keep up with the cavalry while providing solid support during tactical encounters.

Detachments Dore and Argent appear on the map at any of locations A, B, and C on Turn One.

Unfortunately, the French High Command has determined that the county of Five Villages is just too costly an area for operations and pulled all forces from the region.  They will move off and look for greener sheep to fleece elsewhere. 

This concludes this campaign, but we'll leave the blog up just in case we decide to have a second one in 2022.  Thank you for reading along.

Saturday, December 11, 2021

The British High Command Reacts

The British High Command could not be more thrilled with the performance of Colonel Carter.  For the loss of just one band of local guerillas, a handful of infantry, and some battered cavalry, Co. Carter managed to prevent the loss of even a single grain of wheat from the Five Villages county.  So impressed are they with his performance that they have decided to allow him to continue his success with the forces he has on hand.  However, a small handful of previously wounded or incapacitated troops arrive in the night to replace British losses.

As night fell, the British forces controlled Orange Chicken Bridge and Hethwill Farm.  They have no knowledge of the whereabouts of the remaining French forces nor what reinforcements may arrive on Day Two. 

General Irban retains command of the following forces present in the operational area at the start of Day Two:

Detachment Lion (encamped at Orange Chicken Bridge)

  • Colonel Carter (mounted, Lay of the Land)
  • One Unit Line Infantry
    • Captain Birdwhistle
    • Standard Bearer
    • Drummer
    • Seven infantry with musket and bayonet
  • One Unit Light Dragoons
    • Sergeant Eatonfield
    • Standard Bearer
    • Three dragoons with carbine, pistol, and sabre
Detachment Wheel (also encamped at Orange Chicken Bridge)
  • Lt. Col. Secondfiddle
  • One Unit Line Infantry
    • Sergeant Dixonbailey
    • Drummer
    • Five infantry with musket and bayonet
  • One Unit Rifles
    • Captain Villinford
    • Five infantry with rifle and sword
  • One light cannon with crew
Detachment Unicorn (encamped at Hethwill Farm)
  • Lt. Colonel Stalworth(foot, For King and Country)
  • One Unit Line Infantry
    • Captain Baileydixon
    • Standard Bearer
    • Drummer
    • Nine infantry with musket and bayonet
  • One Unit Hussars
    • Captain Dankworth
    • Standard Bearer
    • Four hussars with carbine, pistol, and sabre
We'll leave it here for the time being...

Thursday, December 9, 2021

Third Battle: Orange Chicken Bridge

Realizing that Colonel Carter of the British Detachment Lion has things well in hand up near Jamesel Swamp, Lt. Col. Secondfiddle turns Detachment Wheel right at the crossroads in Hopeton, only to find the French already in possession of Orange Chicken Bridge.


The French took advantage of what little cover they could find, placing their two infantry units behind a small wood to the right of the bridge and one directly behind the shelter of the arch of the bridge itself.

Lt. Col. Secondfiddle spots an opportunity!  As the British approach, they also take advantage of the little bit of cover provided by the shady little bridge.


The gentle slope of the pasture outside of Hopeton gives him a wide open approach to the enemy.  His rifles and light cannon, wrestled so slowly through the day, give him a clear advantage in range - all that sweat equity is about to pay off.  But he doesn't have forever - the hour grows late and sunset will arrive soon.  He must force the bridge today, and cannot count on reinforcements.


The rifle fire and cannon immediately take enough of a toll on the northern French infantry that they abandon the scant protection of the trees and head for safer ground in the shadow of Orange Chicken Bridge.  Their fire blocked by the trees on the near bank, the British race ahead, with the rifles settling in among the trees and engaging in a pleasant little firefight across the racing waters of the steep-banked Drescher Stream.

Meanwhile, the British line infantry heads west, preparing to take the bridge by force.

As the British line dresses their line and assumes column formation on the Hopeton-Young Crossing Road, they hear shouts from behind!


Colonel Carter has arrived along with the survivors of Jamesel Marsh.  The battered men of the Dragoons have no room to operate in the tight confines of the bridge, but the infantry fight there hangs in the balance.  He orders his infantry to race ahead with all deliberate speed.  Recognizing the dangers of sudden changes of command in the heat of a fight such as this, he also hangs back, content to let Secondfiddle show his mettle.


Lt. Col. Secondfiddle hangs back, content to let his men do what they do best.  The French have been cleared from the trees, and it becomes a race against time as the dun dips low in the west.


Eventually, the weight of numbers begins to tell, and the bridge falls to the British, but not until the sun has slipped away beneath the horizon.  


As the last light of dusk fades, the British hold the field, dress their wounds, and make camp.  Colonel ake ready to camp, send messages back to Field Command, and await further orders.

Tuesday, December 7, 2021

Second Fight: Jamesel Marsh

Thanks to the heroic sacrifice of fifteen Spanish guerillas, British Detachment Lion arrived in Hopeton before the French cavalry.  This despite being slowed by the pace of infantry.  Even better, the sound of the guns guided Colonel Carter, the British commander on the scene, to the French.  Unable to spot the enemy due to the blocking buildings of the town, he nevertheless managed to get north of Hopeton and nearly interrupt the French Detachment Bleu as they were recovering from the brief fight with the locals.  

It helped that the British commander of Detachment Lion, Colonel Carter, was very familiar with the territory.  In game terms, he has a special ability called Lay of the Land.  Upon arrival in Hopeton, he discovered a strange thing - the signs pointing the way to Beccaville had been subtly altered.  A less experience commander might have turned east instead of west and completely missed the threat of the French cavalry.  What doubts Colonel Carter felt were dashed by the sound of the guns, and he wasted no time in engaging the French.


As part of his Lay of the Land ability, Colonel Carter also had the option to move one terrain piece on the table, and he opted to move the swamps to a better defensive position.  Placing his infantry behind the soft and boggy ground forces the French Hussars to swing wide on their journey to ride down the infantry.  Add to that a pair of bad dice rolls on the charge, and the French found themselves exposed to considerable gunfire. 

Two volleys exacted a heavy toll, and even the advantages of more attacks on the charge and a first-strike capability couldn't turn the tide.  On the British left, their Dragoons waited, securing the exposed flank of Sergeant Eatonfield's infantry, hoping in vain to counter-charge the advancing enemy lancers.


Wiped out to a man, this left the French commander, Lt. Colonel Locataire, alone against a mob.  He managed to wheel his horse and disengage, but the dangers of the swamp made the difference once more as, among a few scattered shots sent to hurry him on his way, was the one ball that had his name on it.

On the British left flank, horse met horse in a huge and swirling melee that persisted through two full turns.  Blows were exchanged and the matter hung in doubt until Sergeant Eatonfield led his infantry into the swirling mass, and hoisted a bloody victory upon the tips of his men's bayonets.


Wiped out to a man, Detachment Bleu was no more.

Detachment Lion carried the day, but not without cost.  Their Dragoons  now must spend a full turn resting, binding the wounded, caring for the bodies of the dead.  In all, the bones of four infantry and two Dragoons would be consigned to the earth, and none of the remaining Dragoons escaped without harm.

What this means for the larger campaign remains uncertain at this point.  Colonel Carter has a difficult choice to make - movement to west attracts his attention.  Blue uniforms glimpsed beyond Drescher Stream pose a threat, but what forces remain to his north?  Does he ride to reinforce Detachment Wheel - tasked with securing Orange Chicken Bridge - or does his continue with his orders and reach Beccaville by nightfall?


Sunday, December 5, 2021

First Blood: Whitmarsh Wood

Gunfire shatters the still morning air.

Advance cavalry of the French foraging parties caught their first sight of the enemy at seven of the clock, just south of Beccaville.  A small unit of Spanish Guerillas, surprised by the appearance of French to the north, fled Beccaville, leaving their uneaten breakfast behind.  Making for the safety of the British lines, they quickly realized evasion was impossible and took to the refuge of a small woods east of the road.
 
Alerted to the presence of heavy foot traffic too early in the morning for this corner of Spain, the French hastened through the streets of Beccaville, soon to burst out into the open land beyond.  In the distance, they caught the flash of color and gleam of steel of men running through the meadows.  A glimpse was all they needed to confirm the presence of enemy guerillas waiting there in the shadows.

The guerillas waited in the shade, hoping the French would pass them by, a hope too quickly dashed.  The French commander refused to leave the threat of fifteen well-armed and hostile locals lingering in his rear, and steered his troops, six lancers and six dragoons, off the road, and into the hot maw of battle.
Yes, these are Vendeean Royalist figures.  You go to miniature wars with the miniature armies you have.  They might look like French loyalists, but here they represent Spanish Guerillas.  Taking to the woods failed as it turns out that holding a terrain item with figures prone to letting their emotions get the better of them is a terrible plan.  In Chosen Men, the Spanish Guerillas have a special rule called "Hatred (French)" which allows them to reroll missed hits against any French forces.  Unfortunately it comes at a price - they must pass a leadership test or charge any hated enemy that closes to within 12-inches of them.  

After digging in deeper into the security of the woods, the guerillas fired a single volley that only managed to injure one French hussar.  For this scenario, and based on the figures available, the GM designated the guerillas primarily a melee force.  Five with muskets leaves ten with much more effective melee weapsons such as pikes and axes.  Feeling their oats, the guerillas followed up their volley with a pointless charge into the Hussars.

Which negated both the advantages of the terrain, and the advantages of their weapons.  Not only that, it exposed them to a counter-charge by the French Lancers.  Cavalry attack first in this game, so the guerillas had to suffer through a total of nearly 40 attacks!  Each cavalry figure gets two attacks, one each with pistol and sabre, and the charging cavalry unit earns an extra d6 attacks for the charge.

Not a single guerilla survived to 'with my last breath I spit at thee".

Which is not to say that it was a total loss.  The guerillas did slow down the French Cavalry by a full two campaign turns - one for the fight, and one for resting and binding up the wounded.  As you'll see in the next post, this allowed the British defenders to find much better terrain on which to counter-attack the French cavalry force.

Friday, December 3, 2021

Day One: British Orders

In the interests of showing proof-of-concept and demonstrating how easy it is to run a campaign in this manner, I've asked the players for permission to share their written orders.  Here they are in all their original glory.  

Both players helpfully included maps showing the intended routes of march for all three forces at their disposal.  It doesn't have to be much, just a few sketched arrows.

I've held these back until here, at the very end, because they will naturally include significant spoilers.  Specifically, the location of that swamp and the existence of the small guerilla force.

The Hidden Swamp square G25 (see map)

Will take detachment Wheel as a separate detachment.
Guerillas start at D9 (or E6 if D9 isn’t allowed). They will try to delay any column heading tward Baccavilla. If the force is too large retreat over the ford to Iojimbo farm. If likely to be overwhelmed there retreat south to Orange Chick Bridge.

Detachment Lion starts at A and sends the dragoons as fast as possible (with Col. Carter) to Baccavilla. Infantry to follow. If Bacca villa cannot be reach before the French are there then take up position at Hopeton.

Detachment Wheel starts at B and follows Lion up the roads and takes a position at Orange Chicken Bridge. If a Battle seems immanent and they are near one of the other detachments (most likely Lion) they will move to support them.

Detachment Unicorn starts at C and heads up to Hethwill Farm. If the French are there they will stake a position blocking the road at G26 with the hidden swamp supporting their left flank.

If any thing is confusing feel free to ask questions.

It's just that easy.

This will also give you a chance to back-check my decision making as the GM.  Any game of this kind depends in part on the adjudication of the GM, and you might have interpreted the same orders very different than I did.  Here's your chance to compare and come up with your own rulings. 

Wednesday, December 1, 2021

Day One: French Orders

In the interests of showing proof-of-concept and demonstrating how easy it is to run a campaign in this manner, I've asked the players for permission to share their written orders.  Here they are in all their original glory.  This might seem like old news, but it's worth preserving for posterity, and for illustrative purposes as to how easy a GM can make this kind of off-line semi-solo wargame for his players.

Both players helpfully included maps showing the intended routes of march for all three forces at their disposal.  As you can see, the French player went into more detail, even going so far as to re-organize his forces to include a separate cavalry detachment.  That's smart play, but my collection can't handle that many horses on the board at once, so we had to work around it a little bit.

The tiny text might be hard to read, so the player sent me the following message as well:

  • COMMANDER’S INTENT

    • Secure supplies from local civilian population while maintaining contact with and deceiving the enemy into committing his main force on the wrong axis. 

  • CROSS ATTACHMENTS

    • Hussars under LCL Le Noloc TACON to LCL Locataire

    • Regular INF under LCL Locatair TACON LCL Le Noloc

    • Dragoons, Light Infantry, Artillery piece TACON to LCL Le Noloc

  • HUMINT assets [edit note: he means the SPY] at TANTRUM ON THE GREEN to turn the signs at fork from HOPETON to an unused path (A or B) to create traffic jam confusion. Determine and report any commander and dispositions.

  • SECONDARY EFFORT: LCL Mur seize ORANGE CHICKEN BRIDGE, prepare bridge for demolition and fortify for defense along E-W axis.

  • MAIN EFFORT: LCL Locataire. Find, Harry, and maintain contact with eny down BECCAVILLE-HOPETON-TANTRUM road. Hussars secure supplies if opportunity arises. Lancers to remain a mobile screening force.

  • LCL LE NOLOC advance overland through BEASLY FARM. Secure its supplies and proceed directly to YOUNG CROSSING. Establish screening position on heights SW of YOUNG CROSSING.


Note that I did not include any rules or suggestions that moving signs would be an option.  In a game like this, anything that is not proscribed is permitted, subject to the GMs judgement.  In this case, the British being more familiar with the terrain, I gave the ploy a chance to succeed.

The French High Command Reacts

Disappointing. After a full day of activity the French lost two full detachments, and what do they have to show for it?  They chased off a c...